Hello Backyard Geology friends! Thanks so much for the love on our first Vlog post last week, we appreciate your support!
Have you ever picked up a rock and wondered what that rock is made up of? As geologists we definitely do this, especially if the minerals are far too small to see with the naked eye! This week we wanted to take you on an adventure and explore a valuable tool that geologists use to get a closer look at rocks: Optical Microscopy!
What is Optical Microscopy?
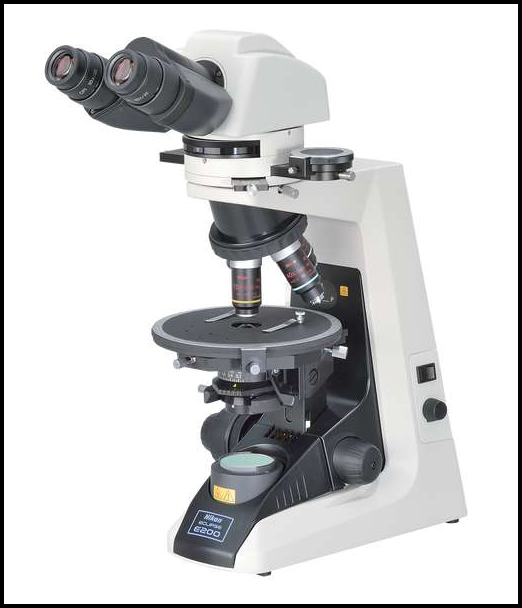
As I mentioned above, when minerals in rocks are too small to identify with the naked eye we turn to this method to aid our understanding of rocks. Optical microscopy is a widely used technique that utilizes visible light passed through a series of lenses at different magnifications to produce an image of the minerals within our rock. The microscope used is often called an optical light microscope, or a petrographic microscope.
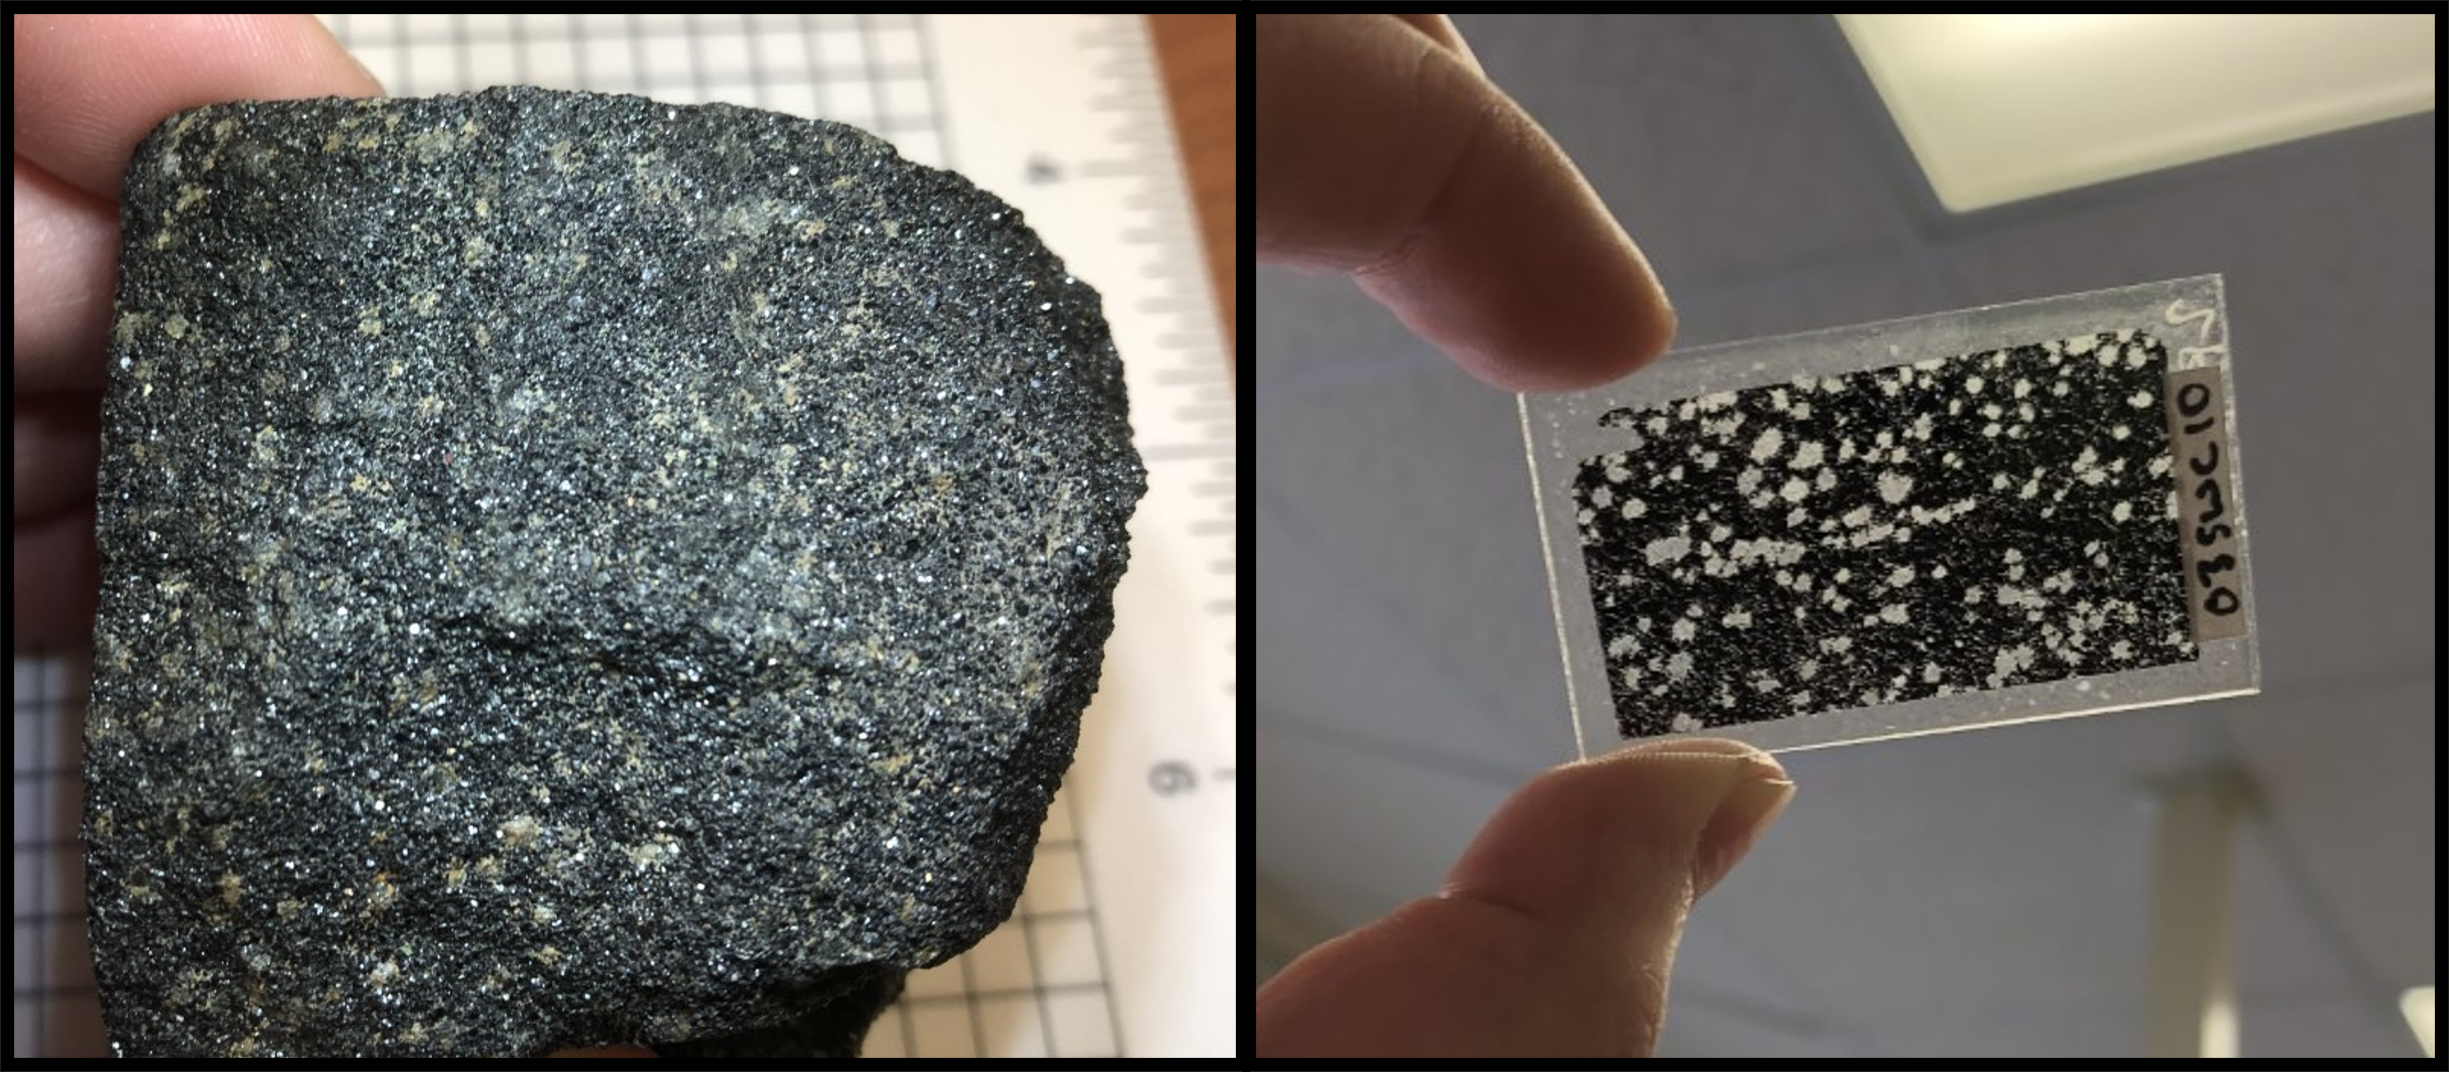
At this point you may be asking yourself, ok cool, so can I just stick my mystery rock under the magnification lens and see inside? A valid question! But, unfortunately it is not that simple. In order to peer inside our rock we need to first create what is called a ‘thin section’. A thin section is essentially a very thin slice of our rock that we create (or send out to a company to make) using specialized rock saws. Because we are relying on light with this technique, we need to make sure that our thin section is thin enough for light to pass through it! The ideal thickness is 30 microns (or the thickness of a human hair!). The image below shows an example of a thin section being held up to the light with its accompanying hand sample. Because our thin section is so thin, many of the minerals are either transparent or translucent- which is exactly what we want!
Ok, so we have our petrographic microscope and we have our thin section, what now? Let’s go ahead and put our thin section under the microscope!
How Does the Microscope Work?
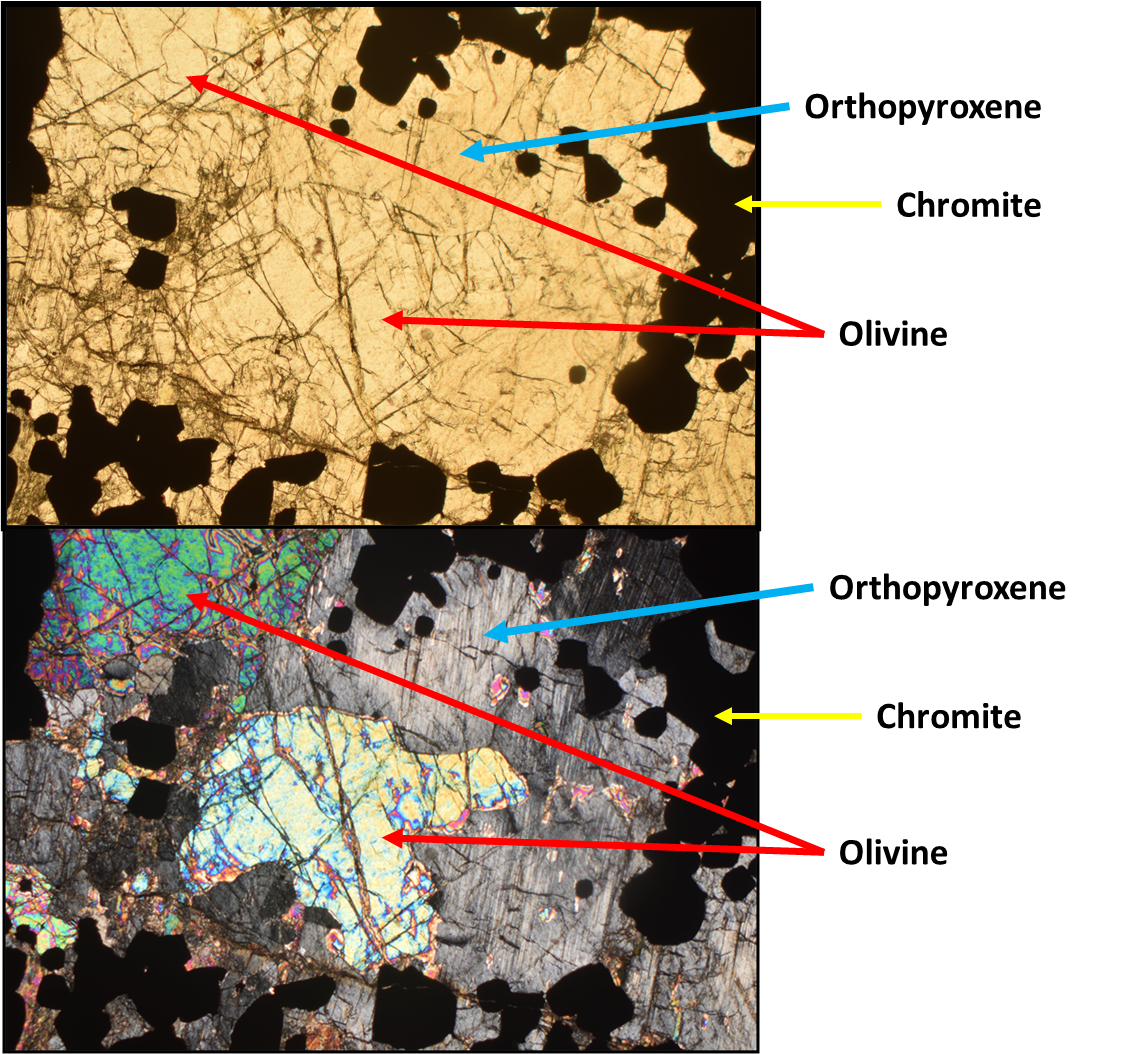
Cool, so we put our thin section under the microscope, peered down the eye pieces and see pretty colors- but what do they mean and wait, why are they colorful here, but when held up to the light they are not that colorful?
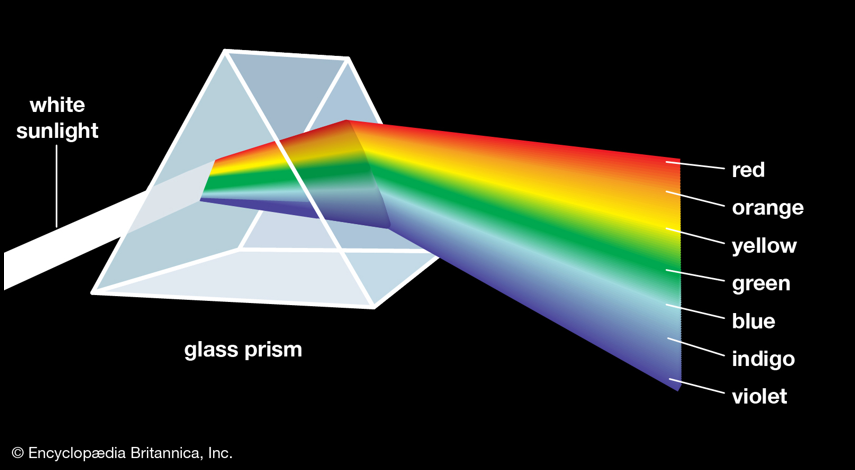
In order to answer that fantastic question, we need to dive into how the microscope actually works utilizing light. The mechanisms of this can be complex at times, so I am going to break this down as simply as possible, so stay with me dear reader. The first thing we need to understand is how light works. At the base of our microscope is light that is made up of all different wavelengths (moving in different directions) that correspond to specific colors of the visible electromagnetic spectrum (like the white light that sunlight or any other light bulb produces). We can test this using the classic prism experiment. The image below illustrates how the prism will split the white light into the various colors representing the different wavelengths.
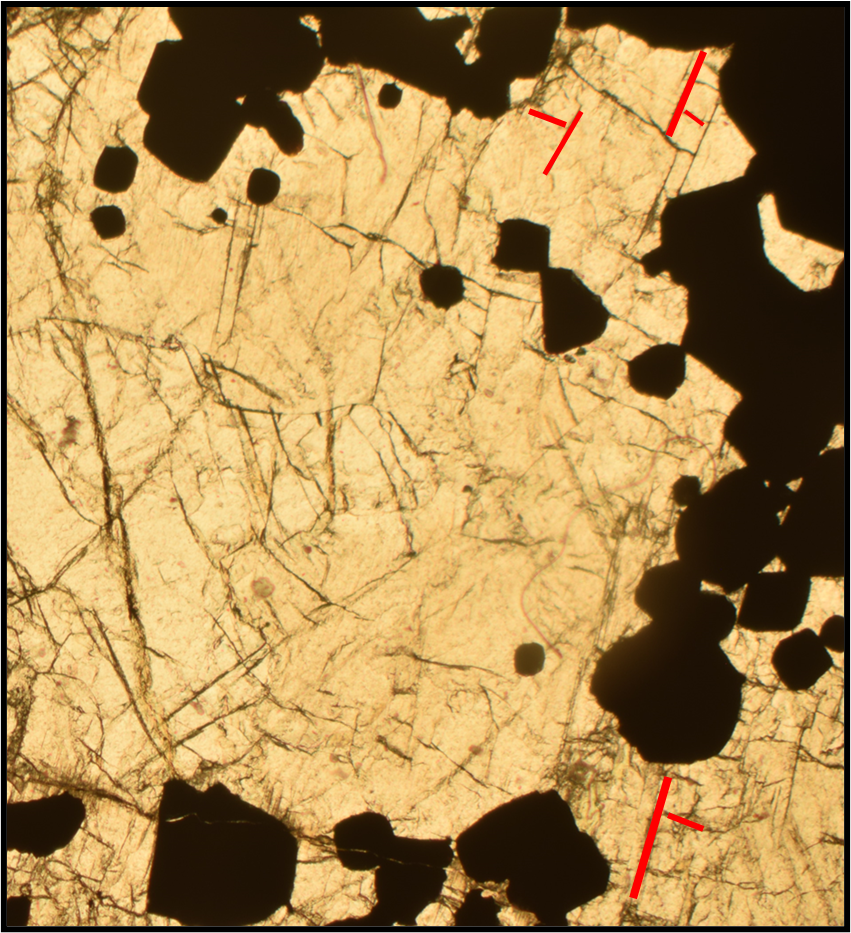
Awesome, so we now know that light from the microscope bulb is white light made up of these different colors. The next thing we need to address is what happens to that light as it leaves the bulb and interacts with the rest of the microscope. There are two extremely important features on our microscope that we must identify: the polarizers. Our microscope has two polarizers, a lower and an upper polarizer. A polarizer is a filter that will only allow light in specific directions to pass through, the rest will be blocked. This is what happens when you wear polarizing sunglasses (if this is not your experience with sunglasses, you may want to purchase new ones…). At the base of our microscope is the lower polarizer (for our purposes it is permanently in the microscope which is not uncommon). As light passes from the bulb through this polarizer, it prevents light vibrating in the North-South direction from getting through (we call this plane polarized light). At this point we can look through the eye pieces and we may see some different colors depending on the minerals in the rock (more on that in a bit), but we will see cracks and fractures in the mineral grains (you can see this in the thin section image above).
At this point, let’s insert the upper polarizer of our microscope (we call this cross polarized light). If we remove our thin section from the stage and look through the eye pieces we will see nothing, it will be dark. This is because our upper polarizer blocks the light vibrating in the East-West direction so with both polarizers inserted we block all of the light. Now comes the fun part, let’s put our thin section back on the stage with both polarizers inserted. OMG, colors!!!! The minerals in the thin section redirect the light and will produce the fabulous colors we see when we look into the eye pieces. This process of the light being directed from the bulb to our eye pieces is illustrated in the image below.
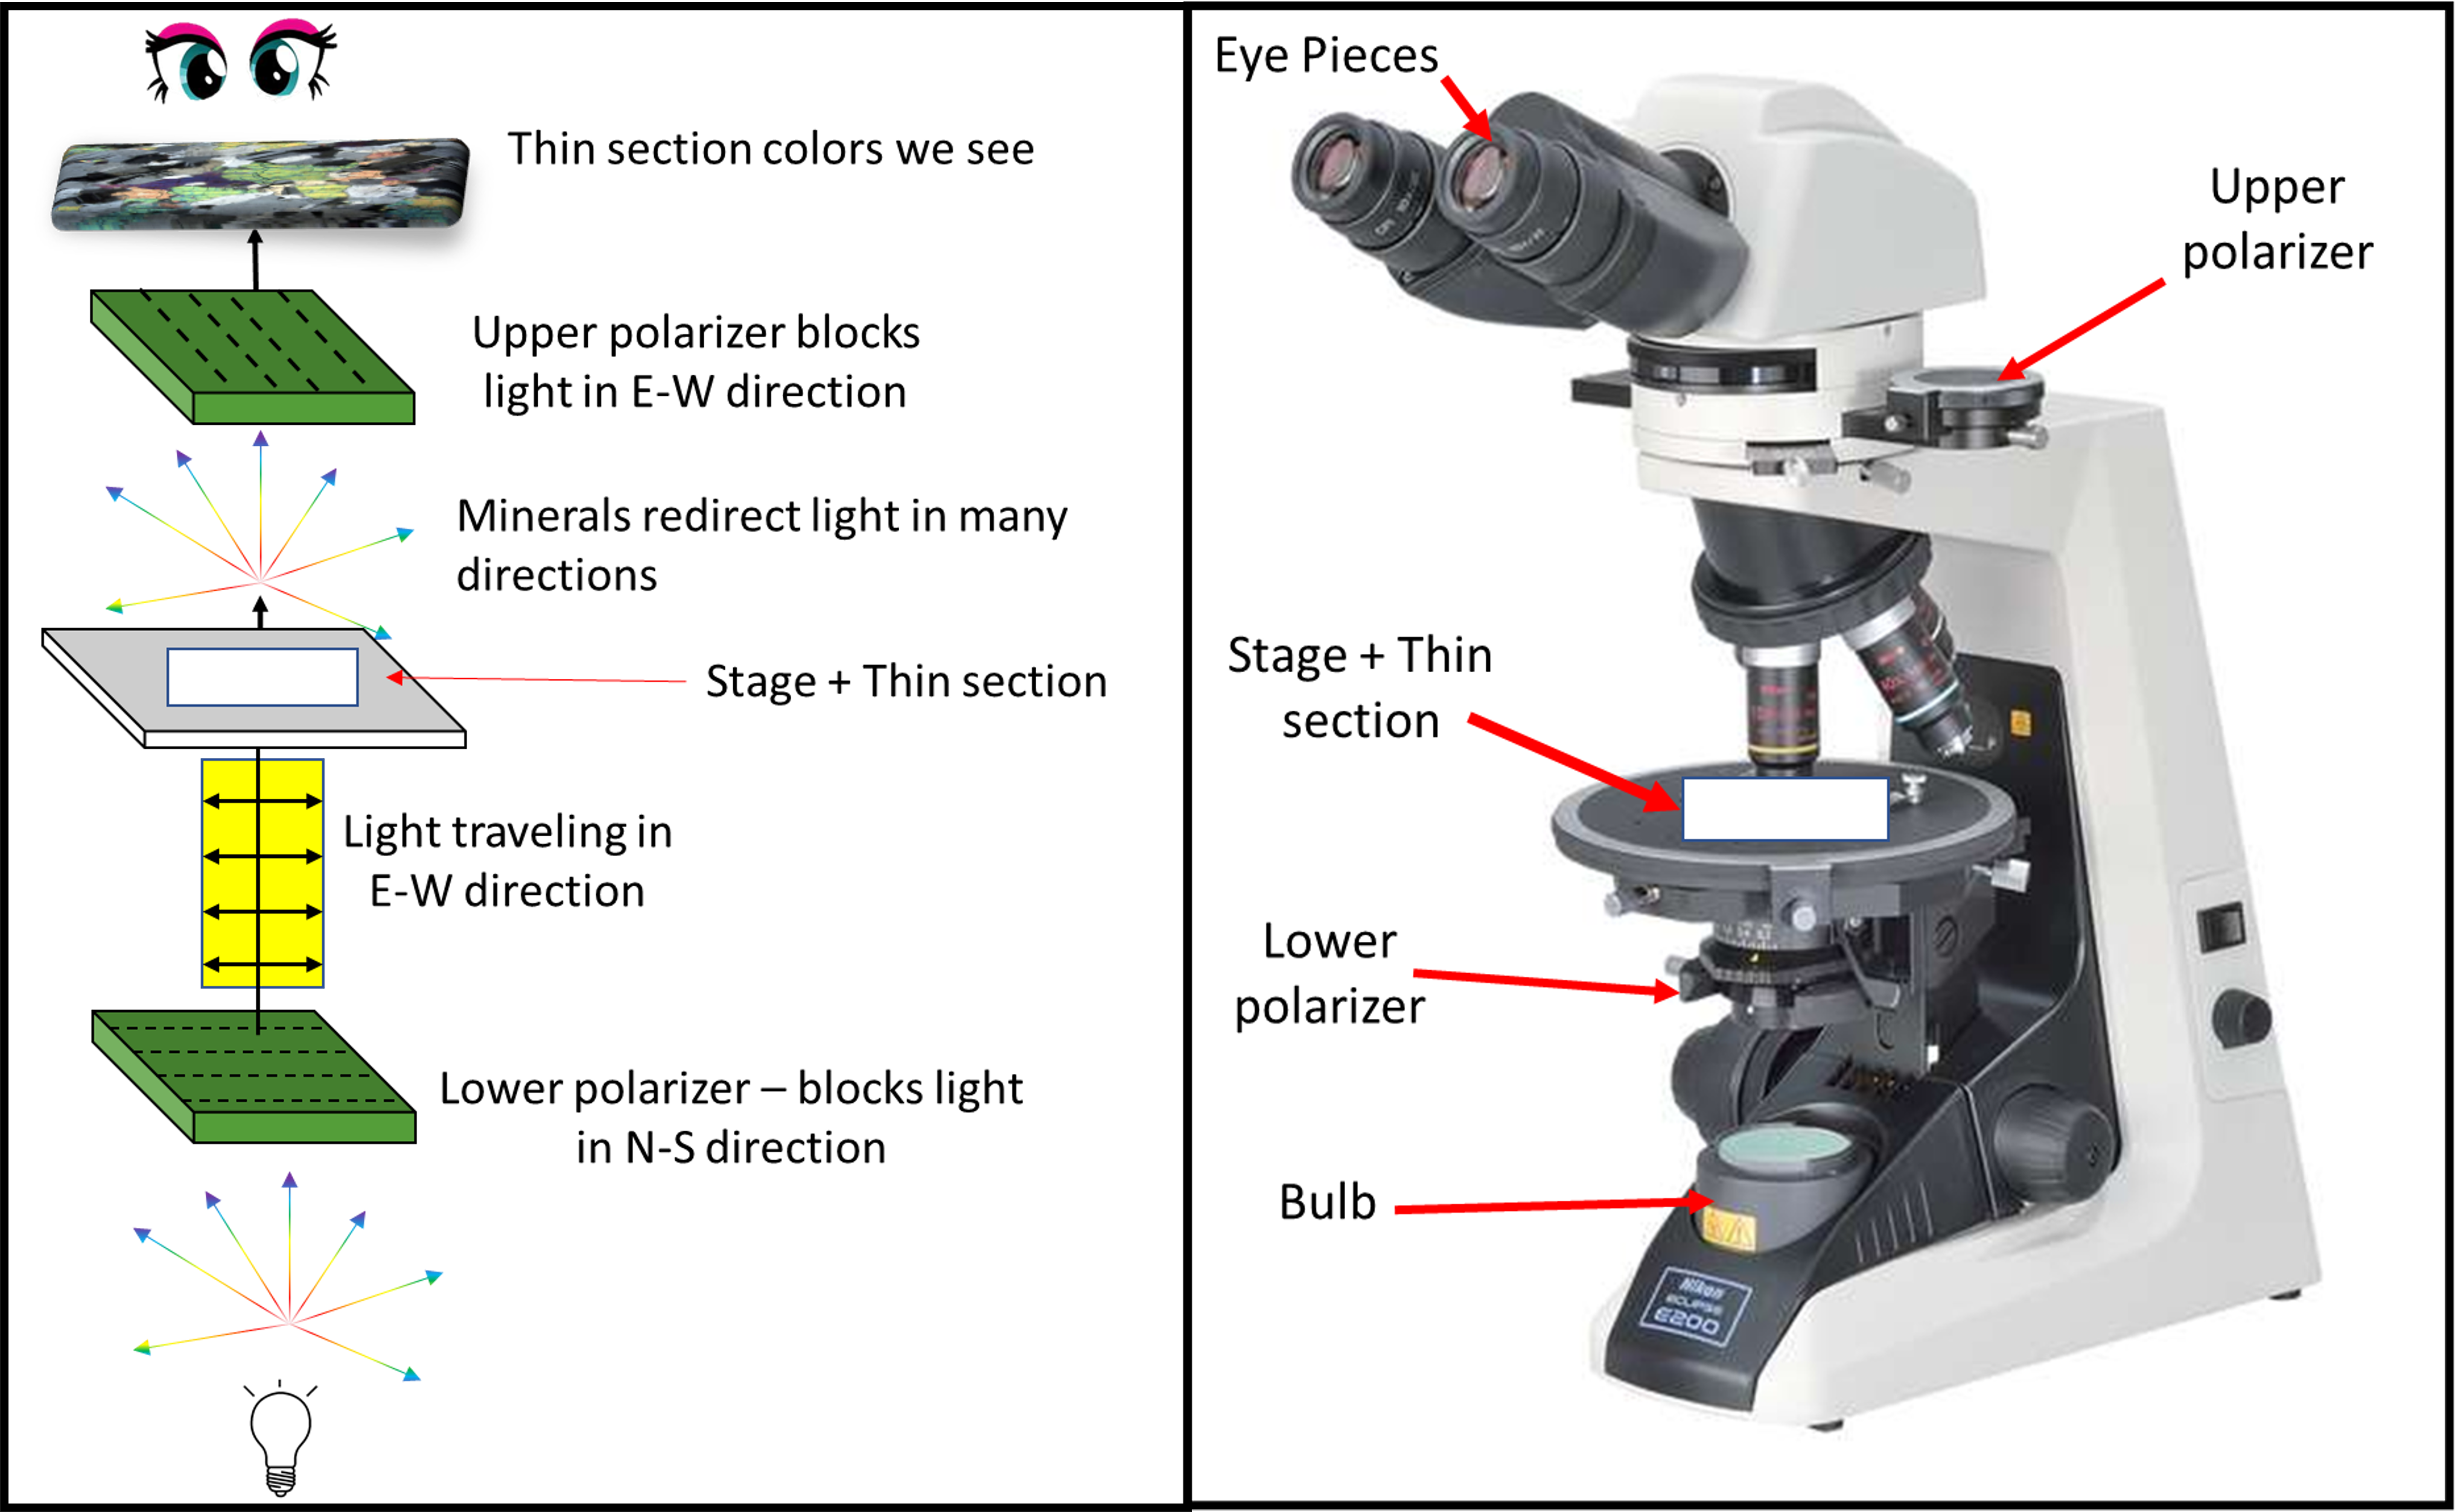
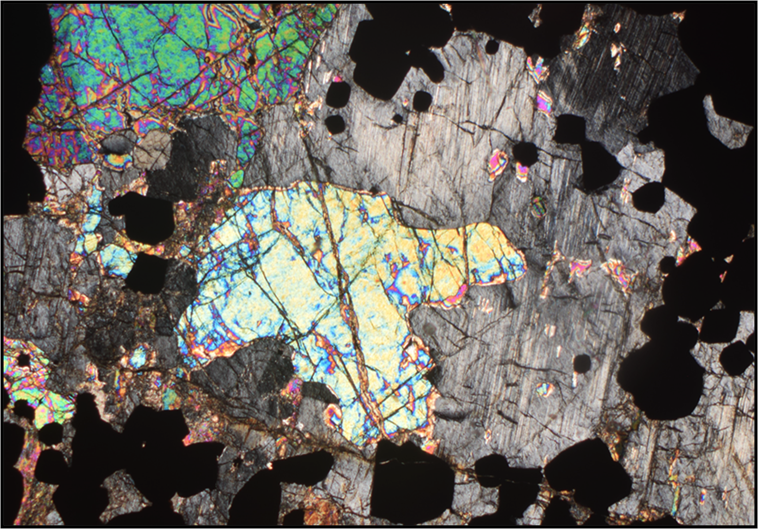
Ok, ok, so by now you may be asking yourself, ‘how are the minerals redirecting the light?’. A great question! Minerals are made of ordered atoms that repeat creating a crystalline structure. Based on this internal structure the minerals either will or will not reorient the light that passes through our polarizers. Some minerals cannot reorient the light at all and will stay black no matter which polarizer is inserted into the microscope. Chromite (above in Figure 3) is an example. Some minerals can only reorient the light with the lower polarizer inserted (or in plane polarized light), so they will have a color or be transparent, but with the upper polarizer (in cross polarized light) inserted they will become black in color (no light reoriented). Many minerals can reorient the light with both polarizers. These minerals can be transparent or have a color when only the upper polarizer is inserted and will be colorful when we insert the upper polarizer. Our olivine and orthopyroxene in the thin section in Figure 3 above are examples of these minerals that can reorient the light with both polarizers.
Identifying Minerals
So at this point we have broken down how the microscope reorients light with both polarizers and a thin section. We touched a little bit on how we can get colors from the minerals in our thin section in the above piece. There are so many different tools we can use to help us identify minerals, but one tool we use is the color of our minerals, especially when we are in cross polarized light (upper polarizer inserted). The colors we see in cross polarized light are called interference colors. If we are to rotate our stage around we will see the colors change from black to a bright color, repeating over and over as we rotate the stage. Minerals have specific interference colors (many have the same, so that’s where our other tools come into play), and that helps us identify them. In the video below you will see the interference colors for olivine and orthopyroxene are very different. Olivine has very vibrant colors while orthopyroxene has duller colors. At the beginning of the video only the lower polarizer is inserted. After the 25 second mark, I insert the upper polarizer and the pretty colors appear!
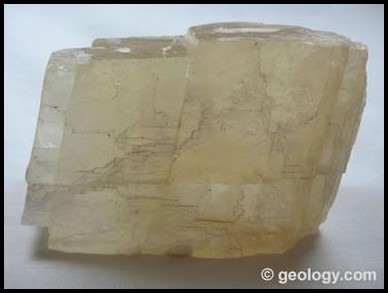
We can also use other properties to help us determine the identity of a mineral, such as cleavage. As mentioned above, minerals have a very specific internal atomic structure. If you were to break particular minerals, some will break along particular regions and create smooth planes, called cleavage planes. A mineral that is great at this is calcite. The image below shows an example of cleavage in calcite.
In our thin section images we will focus on the olivine and orthopyroxene minerals. Olivine does not have cleavage when you break that mineral, it will break in random orientations (it will fracture like glass) . The orthopyroxene, however, breaks at 90 degree angles in two different directions. The image below is annotated to showcase that we can see this cleavage in thin section. So when we encounter minerals that have similar interference colors we can use cleavage to help us narrow down our minerals!
These are just two of the many tools we can use with our petrographic microscope! Phew, that was a lot of information, but we hope you enjoyed the ride learning a bit about an important tool geologists use to learn about rocks!!!!
Want to learn more? Here are other videos to check out about the science behind a petrographic microscope from our friends at www.earthopticsmineralogy.com
Plane polarized light: https://www.youtube.com/watch?v=ahS5KlXqQXc
Cross polarized light: https://www.youtube.com/watch?v=OB7UbgiDGW0

Interesting, like preparing slides in hospital labs!
Yes! That’s true! Thank you for reading 🙂